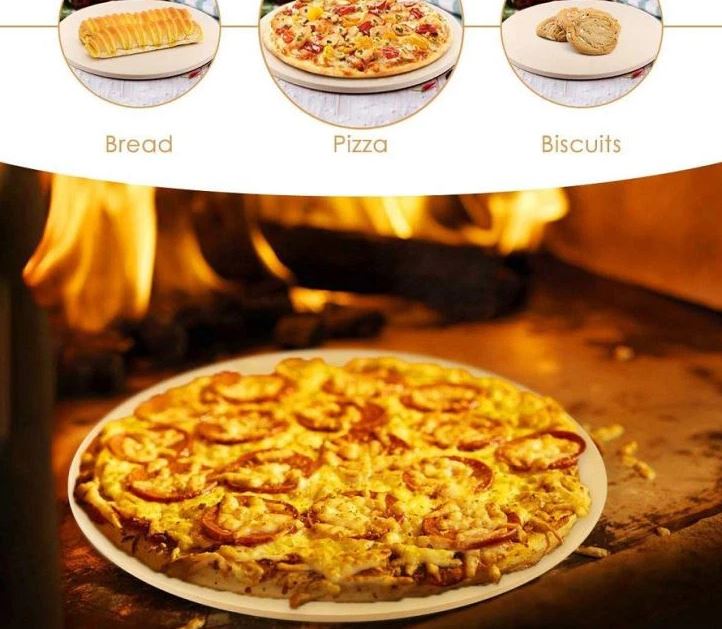
There’s something truly special about biting into a slice of homemade pizza – that perfect balance of crispy crust, bubbling cheese, and your favorite toppings. But if you’ve ever found your homemade pies lacking that authentic, pizzeria-style crispness, the secret might just lie in two essential tools: a Pizza Stone And Peel. This dynamic duo isn’t just for professional chefs; they’re your ticket to elevating your home pizza game from good to absolutely phenomenal. Mastering the pizza stone and peel means unlocking a new world of flavor and texture, transforming your kitchen into a true artisan pizzeria.
The Dynamic Duo: What Are Pizza Stones and Peels?
Before we dive into the delicious details, let’s get acquainted with these pizza-making superstars. Understanding what they are and why they work is the first step to becoming a pizza master.
What Exactly is a Pizza Stone?
Imagine the hearth of a traditional brick oven, where pizzas are baked at scorching temperatures, resulting in that coveted perfectly charred and crispy crust. A pizza stone, essentially a flat slab made from specific materials, is designed to mimic precisely that environment right in your home oven or on your grill. It’s not just a fancy tray; it’s a thermal workhorse.
Pizza stones absorb and retain an incredible amount of heat, distributing it evenly across the entire surface. When your raw dough hits this superheated surface, it immediately begins to cook from the bottom up, preventing sogginess and promoting that delightful crispness. They also draw moisture from the dough, further contributing to a dry, crispy base.
When it comes to materials, you’ll primarily find a few key players:
- Cordierite: This is often the top recommendation for home cooks. Cordierite stones are incredibly durable, highly resistant to thermal shock (meaning they’re less likely to crack from rapid temperature changes), and excellent at retaining and distributing heat. They often come thicker, which helps maintain a steady high temperature, even for multiple pizzas.
- Ceramic: A common and affordable option, ceramic stones perform well but can be more susceptible to thermal shock if not handled carefully (e.g., placing a cold stone into a hot oven).
- Steel: Technically a “baking steel” rather than a stone, these heavy slabs of steel conduct heat even faster and retain it longer than traditional stones. They can produce a more aggressively charred bottom crust, appealing to those who love a serious crunch. However, they are heavier and can be more expensive.
- Cast Iron: Similar to steel, cast iron pizza pans also offer excellent heat retention and can be very versatile for other cooking tasks.
The thickness and shape also matter. A thicker stone (¾ inch or more) generally holds heat better. Rectangular stones often provide more surface area, giving you more room to maneuver your pizza.
And the Mighty Pizza Peel?
If the pizza stone is the stage, the pizza peel is the maestro’s wand, effortlessly moving the star of the show on and off. A pizza peel is a shovel-like tool, typically with a flat surface and a handle, specifically designed to slide raw pizza into a blistering hot oven and retrieve the cooked pie. Without it, getting a delicate, raw dough onto a scorching hot stone would be a near-impossible, sticky mess.
You’ll find two main types of pizza peels:
- Wooden Peels: These are fantastic for beginners. Raw dough tends to stick less to wood than to metal, making the initial transfer easier. They’re excellent for building your pizza on and then launching it.
- Metal Peels (Aluminum/Stainless Steel): Metal peels are thinner and often lighter. While raw dough can stick more easily, their thinness makes them superior for slipping under a pizza that’s already baking on the stone, allowing for rotation or easy removal. Some metal peels are perforated, which helps excess flour fall away, preventing burnt flour smells.
Choosing the right pizza stone and peel for your needs depends on your budget, experience level, and desired results. But rest assured, both are indispensable for achieving that authentic pizzeria experience at home.
Mastering the Heat: How to Use Your Pizza Stone
Using a pizza stone isn’t just about throwing it in the oven; it’s about harnessing its power through proper technique, especially with a pizza peel.
The Golden Rule: Proper Preheating is Key
This is where many home cooks miss a crucial step that can make or break your crust: preheating. A pizza stone needs to be fully saturated with heat to perform its magic.
- Start Cold: Always place your pizza stone in a cold oven. Placing a cold stone into an already hot oven can cause thermal shock, leading to cracks.
- Highest Temperature: Turn your oven to its highest possible setting, usually around 500-550°F (260-290°C). If your oven goes higher, use it!
- Patient Preheat: Let the stone preheat with the oven for at least 45 to 60 minutes after the oven indicates it has reached temperature. This extended time allows the stone to absorb and store maximum heat, which is vital for instantly crisping the bottom of your pizza.
“Think of your pizza stone as a battery for heat,” explains Chef Leo Rossi, a seasoned pizzaiolo. “You wouldn’t expect your phone to last long with a half-charge. The same goes for your stone; a full charge of heat is what gives you that incredible crust.”
Transferring Your Masterpiece: A Pizza Peel Tutorial
Once your stone is piping hot, it’s time for the slightly tricky, but ultimately rewarding, dance with your pizza peel.
1. Dust for Success
Generously dust your pizza peel with semolina flour or regular flour. Semolina, with its coarser texture, acts like tiny ball bearings, helping the dough slide effortlessly. Some even use cornmeal. The goal is to create a non-stick surface.
2. Build and Be Swift
Stretch your pizza dough directly on the floured peel. Then, work quickly to add your sauce and toppings. The longer raw dough sits on the peel, the more moisture it releases, making it prone to sticking. Keep your toppings light to prevent a heavy, difficult-to-slide pie.
3. The Confident “Shimmy”
This is the moment of truth. Open your oven door and position the tip of the peel near the back of the hot pizza stone. With a confident, quick, and smooth jerking motion, pull the peel back, allowing the pizza to slide off onto the stone. Don’t hesitate, but don’t rush into a sloppy transfer either. It takes a bit of practice, but you’ll get the hang of it! If you’re using a metal peel, a quick “wiggle” to ensure the pizza moves freely before going to the oven can save you from a sticky situation.
4. Baking Brilliance
Close the oven door immediately to retain heat. Bake your pizza for about 5-8 minutes, or until the crust is golden brown and the cheese is bubbly and melted. If your pizza isn’t cooking evenly, you can use the peel to rotate it halfway through.
Elevate Your Pizza Game: Advanced Tips & Tricks
Ready to push your pizza-making skills even further? These advanced tips will help you consistently achieve professional results.
Achieving That Perfect Crispy Crust
The combination of a screaming hot pizza stone and a well-managed peel is the foundation. For that extra crunch:
- Go Thin: Thinner crusts inherently get crispier. Experiment with stretching your dough a bit more.
- Less is More: Overloading your pizza with toppings introduces excess moisture, making a soggy crust more likely. Stick to fewer, high-quality ingredients.
- Don’t Fear the Broiler (Carefully!): Towards the end of baking, if your cheese isn’t as browned as you’d like but the crust is perfect, a very brief stint under the broiler (30-60 seconds, with constant supervision!) can add extra char and bubble.
Beyond the Oven: Grilling with Your Pizza Stone
Who says pizza night is only for indoors? A pizza stone can work wonders on your outdoor grill, infusing your pies with a fantastic smoky flavor reminiscent of wood-fired ovens.
- Indirect Heat is Best: Place your pizza stone on the grill grates while the grill is cold. Preheat the grill to its highest temperature, leaving one or two burners off to create an indirect heat zone.
- Gradual Heating: Allow the stone to heat up for at least 30-45 minutes with the grill lid closed.
- Transfer & Bake: Use your peel to transfer the pizza to the hot stone, preferably over the indirect heat zone. Close the lid and cook, rotating as needed, until done.
Rotating for Perfection
Even the best ovens can have hot spots. To ensure an evenly cooked pizza with a consistent crust, a quick rotation halfway through baking is a game-changer. Use your metal pizza peel to quickly slide under the pizza, lift it slightly, rotate it 180 degrees, and slide it back onto the stone. This ensures all sides get equal exposure to the intense heat.
Caring for Your Tools: Maintenance for Longevity
Proper care ensures your pizza stone and peel will be your trusty companions for countless pizza nights.
Cleaning Your Pizza Stone
Pizza stones are unique and require specific cleaning practices to maintain their effectiveness and avoid damage.
- Cool Down Completely: This is paramount. Never expose a hot pizza stone to cold water or a cold surface. The rapid temperature change can cause thermal shock, leading to cracks. Always let your stone cool down completely inside the oven before removing it.
- Scrape and Brush: Once cool, use a stiff brush or a plastic scraper to remove any stuck-on food bits or burned crumbs.
- No Soap! Pizza stones are porous and will absorb soap, which can lead to a soapy-tasting pizza later on. Avoid detergents entirely. Hot water and a brush are usually sufficient for stubborn spots.
- Embrace Discoloration: Your pizza stone will darken and develop dark spots over time – this is perfectly normal and a sign of a well-loved, well-used stone, often called “seasoning.” It doesn’t affect performance.
- Air Dry: Ensure the stone is completely dry before its next use or storage to prevent mold. Many people store their stones right in the oven.
Maintaining Your Pizza Peel
- Wooden Peels: Scrape off any stuck-on dough or cheese. Hand wash with warm water and a minimal amount of mild soap if necessary, then rinse thoroughly. Dry immediately to prevent warping or cracking. Periodically, you might want to rub it with food-grade mineral oil to keep the wood conditioned.
- Metal Peels: These are generally easier to clean. Hand wash with warm, soapy water, rinse, and dry completely to prevent rust.
Why Bother? The Irresistible Benefits of Pizza Stone and Peel
You might be wondering if these extra tools are truly worth the investment. The answer, for any serious home pizza enthusiast, is a resounding yes!
- Restaurant-Quality Crust: This is the primary draw. The intense, even heat from a pizza stone creates a crust that is both crispy on the outside and wonderfully chewy on the inside, a texture you simply can’t achieve on a regular baking sheet.
- Even Cooking: No more unevenly baked pizzas! The stone’s heat distribution ensures your pie cooks uniformly from edge to center.
- Enhanced Flavor: A well-baked crust contributes significantly to the overall flavor profile of your pizza, adding a depth that elevates every bite.
- The Joy of Homemade: There’s immense satisfaction in crafting a pizza from scratch that rivals your favorite pizzeria. The pizza stone and peel make this experience not just possible, but genuinely enjoyable.
“Using a pizza stone and peel isn’t just about better pizza; it’s about embracing the art of pizza making,” says Isabella Ricci, a culinary instructor specializing in Italian cuisine. “It connects you to centuries of tradition and allows for incredible creative freedom in your kitchen.”
Your Burning Questions Answered
Q: Can I use a pizza stone without a peel?
A: While technically possible using a baking sheet or parchment paper to slide the pizza, a pizza peel makes the process much safer, easier, and more effective, especially for transferring the raw dough onto a scorching hot stone and retrieving it. It’s highly recommended to use both for the best experience.
Q: How do I prevent my pizza from sticking to the peel?
A: The key is ample lubrication. Generously dust your peel with semolina flour or regular flour. Work quickly after stretching the dough and adding toppings. Before transferring, give the peel a gentle shake to ensure the pizza slides freely. If it sticks, a thin metal spatula dusted with flour can help loosen it.
Q: What’s the best material for a pizza stone?
A: For most home cooks, a cordierite pizza stone is highly recommended due to its durability, resistance to thermal shock, and excellent heat retention. Baking steels are also popular for their intense heat transfer and robust char.
Q: How often should I clean my pizza stone?
A: You only need to clean your pizza stone when there’s significant food residue. For routine use, simply scrape off any crumbs or stuck-on bits after it has completely cooled. Avoid deep cleaning with soap. Discoloration is normal and doesn’t require cleaning.
Q: Can I use a pizza stone on a gas grill?
A: Yes, many pizza stones are grill-safe, especially cordierite ones. Place it on a cold grill, preheat gradually, and ideally cook the pizza over indirect heat for best results and to prevent the bottom from burning too quickly.
Q: Do I need to season my pizza stone?
A: Most modern cordierite pizza stones do not require seasoning. Some ceramic or natural stone types might benefit from an initial light oil seasoning. Always check the manufacturer’s instructions. Keep in mind that natural discoloration and darkening over time is normal and beneficial, creating a natural non-stick surface.
Take Your Pizza to the Next Level
The journey to perfect homemade pizza is an exciting one, and the pizza stone and peel are your indispensable guides. They invite you to experiment, to refine your technique, and to savor the incredible difference that proper tools make. So, dust off your peel, preheat that stone, and get ready to create pizzas that will amaze your family and friends. Embrace the process, share the joy, and most importantly, enjoy every delicious, crispy bite of your homemade masterpiece!